 Microsoft develops a lot of e-learning on its own products, and you can find samples on the Microsoft E-learning site. They all follow the same template and style, and are in my humble opinions excellent pieces of learning content for the intended type of subject and audience.
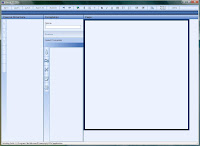
And now for the good part: the internal tool they use to develop these courses is now freely available on the Microsoft site. It is called the Learning Content Development System or LCDS, installs easily and has a simple form-based editor. It shows the course structure, a list of templates you can use, and the properties like text, animations and images that go on that template screen. There is a preview button, and the output is SCORM content. Voila. What do you want more?
There is an online help, but not much more documentation or tutorials then that. So I would recommend you first go to the Microsoft E-learning site. There are always one or two courses available for free that should give you a good feel of what the type of screens is you can make with this tool. (All the animation comes from flash you need to develop outside of the tool.)
I played around with the tool and I'm impressed with its ease. Here are my observations and tips:
- The tool is very strict in what it allows: it comes with its list of templates, and the resulting course will have the Microsoft defined look and navigation in it. If you don't like that, search for another tool that gives you other templates or full flexibility. If you are fine with the approach, you'll love the tool.
- Tip for Vista users: by default the tool installs in the c:\Program Files\Microsoft\Learning folder. It also stores all courses here (and you cannot configure that). As that part of the hard disk is not writeable for non-administrators on Vista, it will cause a lot of problems and security popups. My suggestion: after you install LCDS, move or copy the folder somewhere under 'My Documents', and start up the author.exe file from there.
- Tip for media: the images, animations, video you want to include all need to be in the media folder underneath the course folder. The form will only let you pick media that you have manually copied there first. So open up the media folder with the button on the toolbar, and drag/drop all media in there first, before using them in the course pages. This is a little something that could have been solved more nicely, but once you know it works out just fine.


No comments:
Post a Comment