So let us start at the beginnings.
1- Download of the Moodle code. Initially I downloaded version 1.8 because that is the latest stable release. Go to http://download.moodle.org/ and download the zip package. I also downloaded extra modules (the scorm module) and extra language packs (Dutch and French), but later I found out that you don't need that. The SCORM module is included by default and the language packs can be downloaded and installed automatically via the Moodle administration interface.
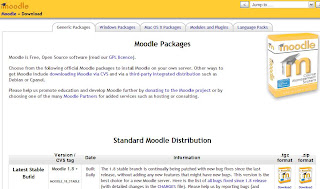
2- Unzipped the package somewhere on my hard disk. The zip file is about 12 MB, the unzipped folder about 35 MB.
3- I also printed out the manual at http://docs.moodle.org/en/Installing_Moodle
4- Then I needed to copy the contents of the unzipped package to my web server. Moodle is a PHP application and uses MySQL as a database. As I use a web host (ipowerweb), I needed to transfer via FTP. I created a folder 'moodle' and transferred all the files. That took quite some time. (15-20 minutes) In case you want to know, I use the free FileZilla FTP client.
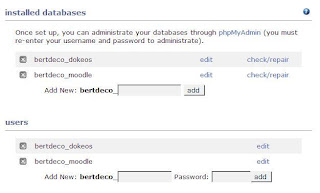
5- Before you can start the installation script, the database must exist. So I created a new MySQL database and a new MySQL database user account for the Moodle program. With my web hosting provider I can do that via the control panel web interface. Other providers will have similar tools. If it is a local server you can use the popular PhpMyAdmin tool.
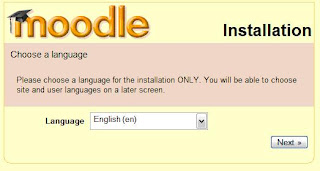
6- Start of the installation program. Very easy, just opened my browser and went to the URL of where I copied the moodle code. The installation program will automatically start. If that doesn't work somehow, go to 'install.php' in the root. First step is to select the language for installation. This doesn't affect Moodle itself, it's just the language shown during the installation.
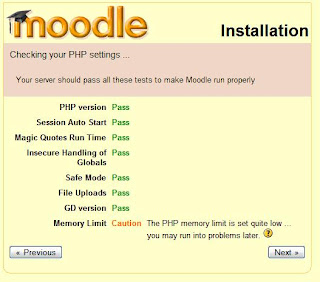
7- Next screen is important as it checks for prerequisites such as PHP settings. If any is not OK you will be warned and you have a help section on how to resolve them. For some settings you cannot continue with the installation until the prerequisites are met. In my case the memory limit was too low. If you have full acess to the server you can change settings in your PHP.ini config file. On a hosting provider, you may not have access to that, as in my case. But then you might be able to create a file called .htaccess (no name, just .htaccess as file name) with commands in likephp_value memory_limit 16M. More info on: http://www.javascriptkit.com/howto/htaccess.shtml
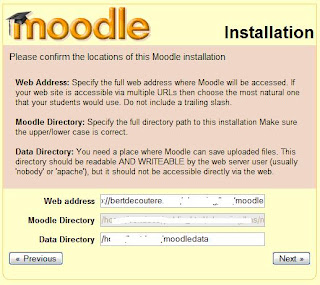
8- Next I needed to provide the locations of the moodle folder and the moodle data folder. They are prefilled for you but make sure the Data Directory folder points to an existing folder. In that folder Moodle will store uploaded files and it is recommended to put that folder outside of the moodle main folder. If it is not, you can still continue with the installation but you will get an error message "fopen ... failed to open stream moodledata" on top of each screen as I found out later. They really want you to put that folder elsewere :-).
9- Next screen is for the database configuration. Filled in the host server name (type 'localhost' if it is the same as the web server), the database name and database user configured in step 5. If you want the installation script can add a prefix to all table names. (In case you want to reuse an existing database and want to avoid name clashes. I have 5 MySQL databases in my hosting package so I didn't need to share with another application. For production servers that would not be a good idea either.)
10- Son of a biscuit! I'm blocked at the next screen that again checks for prerequisites but this time on the level of the database. Turns out I need a higher version than the MySQL that comes with the ipowerweb package. So IF you can find the version of MySQL and PHP supported by your hosting provider, check them before you start your installation :-) . (It's called 'Read the F****** Manual', but who does?)
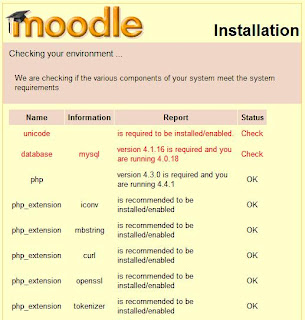
So I started the whole thing over on my other hosting provider, seekdotnet. This time I succeeded because they do support PHP and MySQL versions that are high enough to meet the demands of Moodle.
11- Next screen asked me about installing language packs. There is time to do that later once installed, so I just pressed Next.
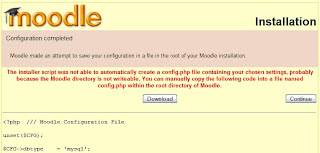
12- The final screen tries to write all those changes to a config file in your moodle installation directory. If your site is even a bit secured, that will not work, and you'll get an error saying you need to manually copy the content shown on the screen to a file config.php in the Moodle directory. So I copied the text, created the config.php file and pasted it in and pressed Continue.
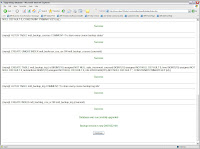
13- Next, the database creation scripts run. Don't be like me and refresh the browser when it takes some time. You'll have 5 or 6 pages with database scripts that run, and wait untill you see a button 'Continue' at the bottom of the page. It is the same kind of screens you'll see after updating the moodle installation. I had better experience doing this in Internet Explorer than in Firefox where the continue button didn't work.
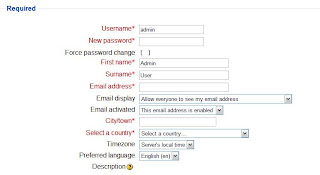
14- Next screen you need to fill in the administrative details of the site such as the name.
15- Next I installed language packs to make it a multilingual learning portal. Go to menu on the left, choose languages, install language pack. Point to them, they are downloaded and installed automatically. It's that simple.
Done.
My conclusion:
Moodle installs quite easily, but you need to check your environment meets all requirements. If you get stuck the forums or other web sites will probably have a solution and help you out. The Moodle community is hugh, so the chances you are the only one with a particular problem are really slim.


7 comments:
Try linux then see if you think its easy
If you found problem in installing consider to use Moodle.com services. They are professionals and serious.
Alternatively create a free Moodle Hosting at NineHub.com. More than 5,000 teachers or instructors created classes there.
Hi! I just would like to inform NineHub.com provides free Moodle hosting. Please check it. Cheers.
Free Moodle hosting is available at keytoschool.com
No ads, use your own domain. DimDim, Sloodle preinstalled.
Hi! I just would like to inform on this blog ..
Hi! I just would like to inform on this blog ..
Post a Comment